
I have utilized HP System Software Manager for several years. Early on, I started with only bios update softpaqs. I used a single repository for all models, which was ran as a startup script from a network share. I later added additional softpaqs for other system firmware and updated drivers. I later started to use the SSM repositories within an OSD/IPU task sequence. This greatly simplified driver and firmware management for our ConfigMgr environment. The following blog post will detail how to set up both standalone usage in a single repository, and individual model repositories for use within a task sequence.
SSM Overview: The SSM solution utilizes HP softpaq executable files. Each exe has a corresponding CVA file that includes information about the softpaq. SSM uses these files to create a database of information about all the softpaqs in the repository. SSM uses that database to determine which softpaqs are applicable to which model. The idea here is to download needed softpaqs and CVA files into a directory, update the database, and then run the SSM utility on a model to apply the updates. If you need to replace an outdated softpaq, simply replace with a newer version and update the database again. Once you get the structure in place, it is very straightforward.
Standalone Setup:
1. Download the latest SSM version, and install the product using setup defaults. This will result in ssm.exe and ssm.cab in the c:\program files (x86)\HP\System Software Manager folder, as well as a couple documentation shortcuts.
2. The exe and cab files are what you really need here. Copy them to a dedicated shared folder, and grant read access to your client computers.
3. Run ssm.exe as admin from the shared folder, accept the license agreement, and click next on the welcome screen. If you don’t run from the shared folder, the file store path will not reflect the server share on the next screen.
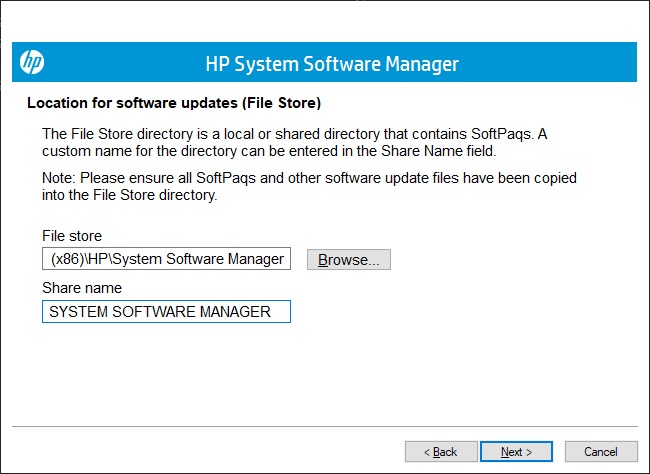
4. Confirm the file store and share name are correct for your environment, click next.

5. Choose options for the repository. Since this is a standalone repository, I have selected to reboot the client upon completion of updates. I also chose to show the user a status bar, and to have centralized logfile share.

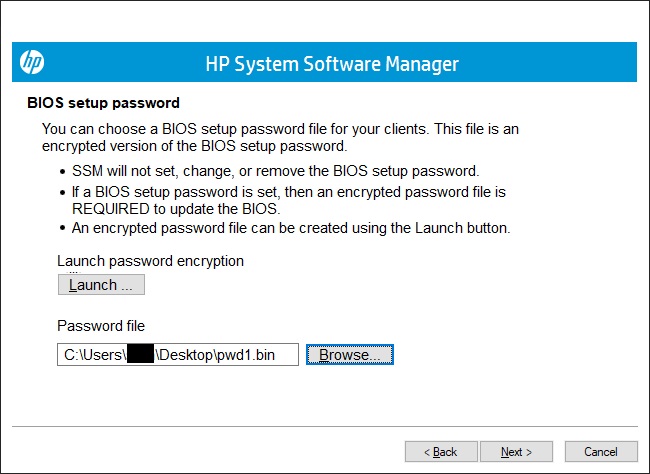
6. If you use a bios password (which you should, IMHO), click the launch button on the next screen to create an encrypted password file, then browse to that file, then click next.

7. Confirm your choices on the summary screen, then click next.

8. On the next screen, select the option to ‘Check ftp.hp.com for CVA file updates’ and then click ‘Build Database’. This should not take long as you currently have an empty repository. Once complete, click ‘Finish’.

9. At this point, you should now have a shared directory with several SSM files. You now need to add softpaq files to the directory. The file and folder structure doesn’t really matter here, but you can simplify things by model and softpaq driver type (bios, video, audio, etc) to keep it looking clean. Another option is to look at my Automating HP SoftPaq Repository Updates Using PowerShell blog post if you would like to automate this process.
10. Once you add your softpaqs, the last step is to update the database. This will need to be done any time the softpaq content changes. This can be done by running ‘ssm.exe /am_bld_db from that directory. I typically create a shortcut to do this, which allows you to right click and ‘run as admin’ to do the update.
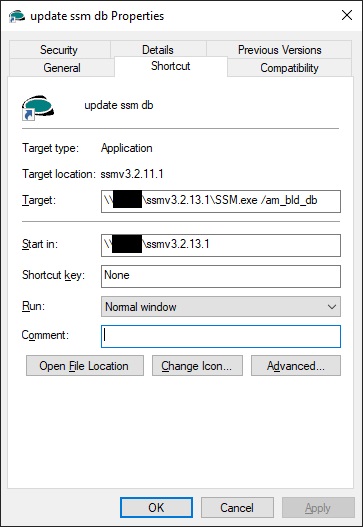
11. You are now set to run a batch file with the following as a startup script from your share, or anytime on demand.
\\servername\ssmv3.2.13.1\ssm.exe \\servername\ssmv3.2.13.1 /accept
Task Sequence Setup:
In order to use SSM within a task sequence, a package needs to be created and distributed. You could use the same approach and have one large repository for all models, but that would result in every model downloading the entire repository to the local cache. That would get out of hand quickly should you have a lot of models. In this situation, I create a separate SSM repository for each model and assign the package to the proper model using a WMI query. Below is the steps to create an individual model repository.
1. Download the latest SSM version, and install the product using setup defaults. This will result in ssm.exe and ssm.cab in the c:\program files (x86)\HP\System Software Manager folder, as well as a couple documentation shortcuts.
2. Run ssm.exe as admin from the c:\program files (x86)\HP\System Software Manager folder, accept the license agreement, and click next on the welcome screen. Keep the default values for the file store and share name path here as they are not really relevant. The end result will be running a local copy of ssm.exe from the package cached to the client. Click Next.
3. Choose options for the repository. Since this will be run with an OSD/IPU task sequence, you will not choose to reboot the client. The task sequence should handle the reboot step so it can continue with the sequence following the reboot. I also choose to not log on this screen as the log location is specified in the command in the task sequence.

4. If you use a bios password (which you should, IMHO), click the launch button on the next screen to create an encrypted password file, then browse to that file, then click next.
5. Confirm your choices on the summary screen, then click next.

6. On the next screen, select the option to ‘Check ftp.hp.com for CVA file updates’ and then click ‘Build Database’. This should not take long as you currently have an empty repository. Once complete, click ‘Finish’.

7. At this point, you should now have a local directory with several SSM files. You now need to create a folder for each of your individual models in your CM sources share, and add the appropriate softpaq files to the directory. The file and folder structure doesn’t really matter here, but you can simplify things by model and softpaq driver type (bios, video, audio, etc) to keep it looking clean. Another option is to look at my Automating HP SoftPaq Repository Updates Using PowerShell blog post if you would like to automate this process.
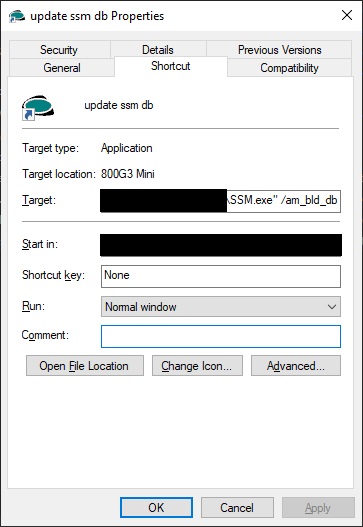
8. Once you add your softpaqs for the individual model for this repository, the last step is to update the database. This will need to be done any time the softpaq content changes. This can be done by running ‘ssm.exe /am_bld_db from that directory. I typically create a shortcut to do this, which allows you to right click and ‘run as admin’ to do the update.
9. Next, create a package without a program within ConfigMgr.
10. With a task sequence, add a ‘Run Command Line’ after the first reboot into the Full OS. Use the package you created for the specific model, and run the following command line.
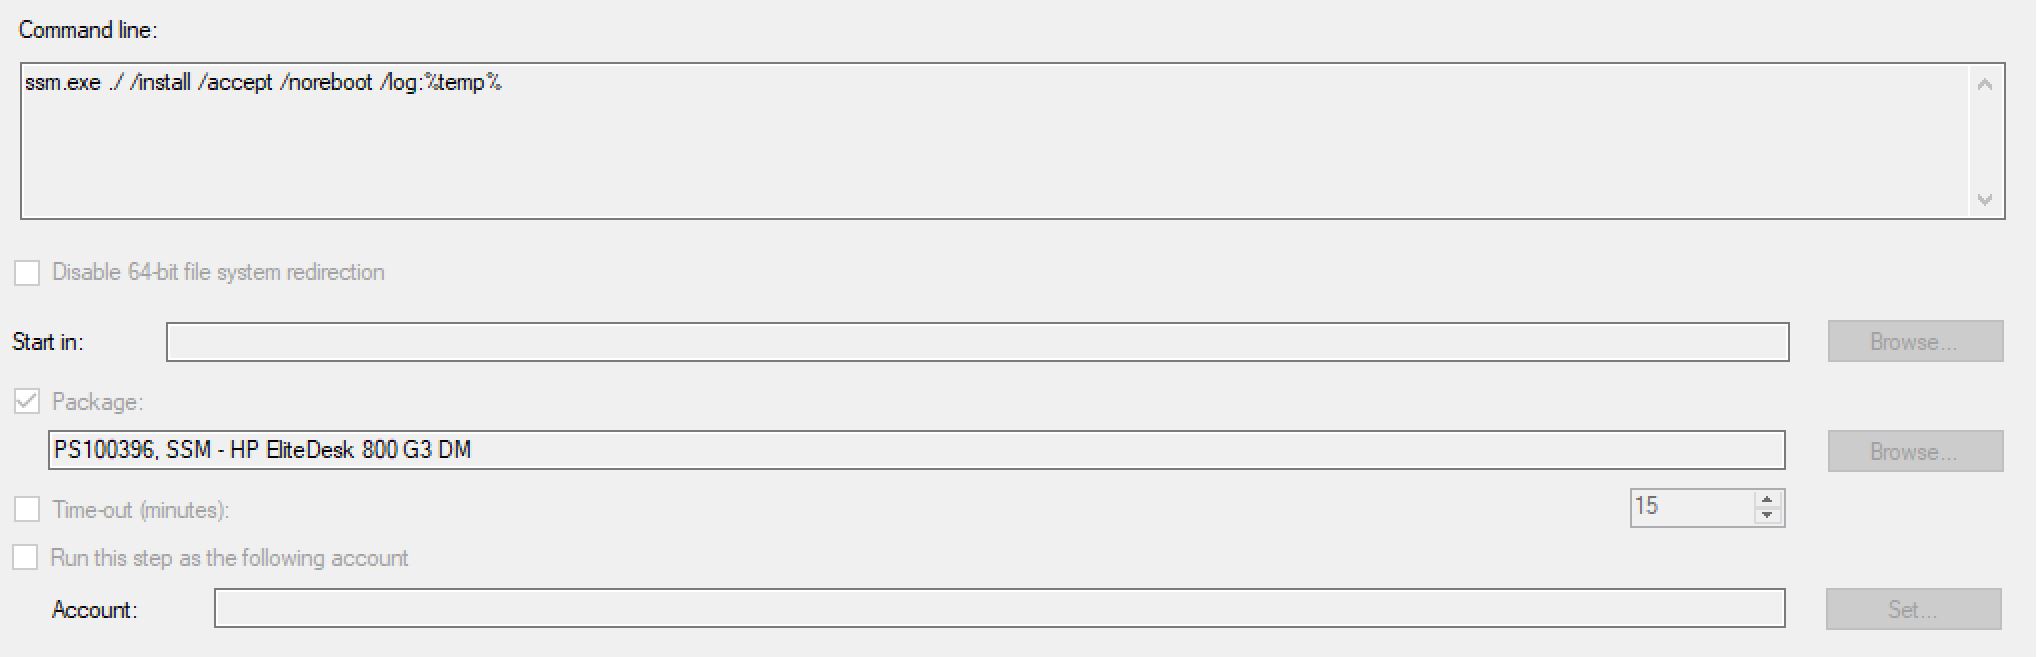
11. On the ‘Run Command Line’ step above, also set the WMI query on the options tab to only apply to the model intended.


Hello Ryan .
Great. blog. Thank you. I am just wondering. We don’t use sccm. Is there a way to create a startup script via a gpo that runs smm.exe and check for drivers and install them on the client pcs. My challenge is that users are not local admins on their pc’s. Is there a way to avoid that ? Maybe you would know. Thank you so much
LikeLike
We have used SSM as a startup script for a specific domain user for our technicians to quickly login and update a computer they are servicing. It is a pretty simple batch file pointing to a share where the SSM repository is located.
@ECHO OFF
\\servername\sharename\ssm.exe \\servername\sharename /accept
Unfortunately, this approach does run in the user context, so the user would have to be a local admin and click on the UAC prompt upon login.
LikeLike
Ryan – is it necessary to pull the group name to ID the model. In our organization we have four types of elitetabs 1012 g1, g2, g3 and 1013.All of them are in the same group of elitetabs. If I download the appropriate files via SDM to my SSM share is SSM smart enough on the client side to figure out what model I’m running and only apply the relevant BIOS update if needed?
LikeLike
Hello Tony,
At the time of this writing, I was using SSM repositories in my MEMCM OSD/IPU task sequences. I separated each model in order to make the packages as small as possible. This avoided downloading unneeded softpaqs from a repository to the client. The models you mentioned probably use a lot of the same softpaqs, so creating one repository to use across your different models would probably not result in using much more storage. Based on the cva files, SSM is aware of which softpaq is needed for each model so a shared repository will work fine.
I have some updated posts about how to use HPIA instead of SSM. I encourage you to check those out, as it can accommodate outdated repositories at runtime and automatically grab the newest versions from HP’s servers if you choose.
LikeLike