
In one of my previous posts, HP Image Assistant Self Service Through Software Center, I explained how to allow end users to update drivers and firmware on existing machines. That process involved using the same softpaq repository MEMCM package that I already created for OSD/IPU task sequences. That works great for on premises use, but would not work outside of the network. The following post will show how I overcame this limitation. Thanks to @nkofahl for answering technical questions!
Cloud Management Gateway FTW!
The previous solution was acceptable, until this COVID-19 thing occurred. We are now seeing more people working from home, and are not consistently connecting their devices to the corporate network. Luckily, ahead of the pandemic, we configured a cloud management gateway (CMG). All of our client machines were aware of the CMG, which opens up a lot of options for configuring machines while they are off network. This post will outline how I setup the self serve option that works both inside and outside of our network.
HP Image Assistant
At the time of this writing, HPIA 5.0.3 is the current version. The first step is to create a package containing HPIA. Extract the contents of the HPIA softpaq to the package location within your CM sources.
BIOS Password
HPIA updates BIOS revisions. Assuming you have a BIOS password configured (and you definitely should!), you will need to include an encrypted bin file containing the BIOS password. This file is created using HP’s BIOS Configuration Utility (BCU). Generate the file, and include that in the root of the HPIA package location as well.
MEMCM Package
Create a package without a program. This will be used as source files for a command line step within the task sequence. Distribute this package to internal distribution points as well as the content enabled CMG. The biggest difference between this package compared to the package from the previous post is there is not a pre-populated softpaq repository. There are two reasons I made this choice:
1. HPIA will analyze the client computer and only download what is needed to update directly from HP’s servers.
2. The other advantage here is it will save on Azure Storage Blob bandwidth. The entire package for HPIA 5.0.3 plus the encrypted BIOS password file is about 16 mb. That is a much more efficient approach from a cost perspective compared to serving up all the softpaq content from our Azure Storage. One thing to consider is if the client is on a metered ‘hotspot’ internet connection. You have to balance the convenience of updating versus the cost of using up their monthly bandwidth allocation.
Task Sequence

The first step in the task sequence is a check readiness step. This is fairly self explanatory. If any of the conditions are not met, the task sequence will throw an error and not start. I chose minimum free disk space, current OS is CLIENT, and AC power is plugged in.
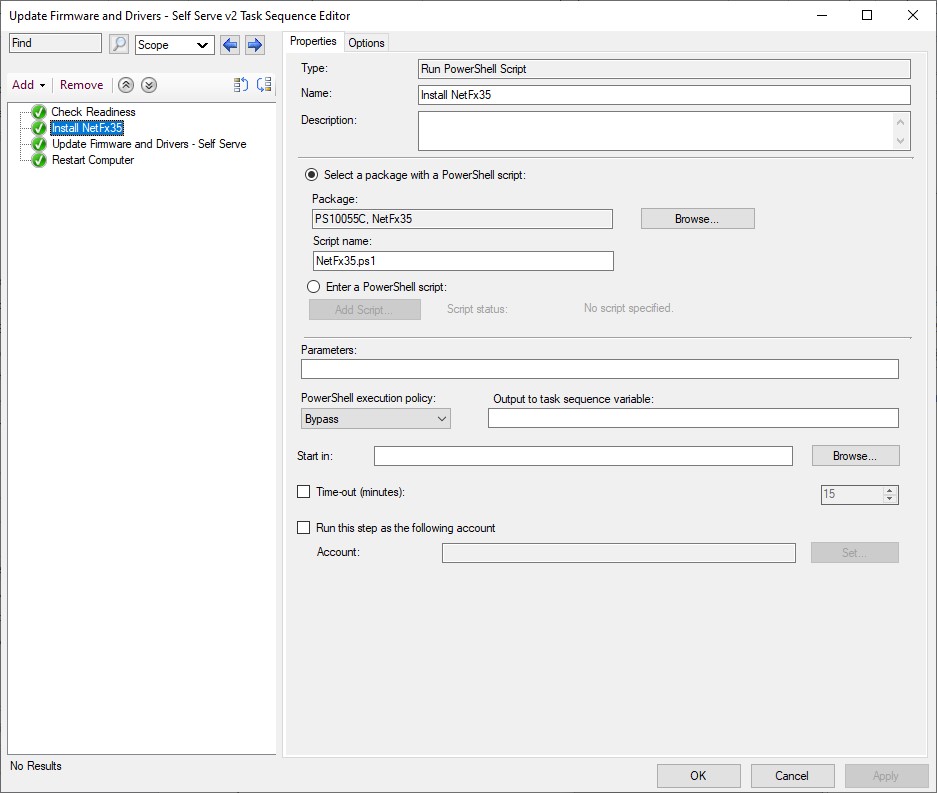
In the HPIA command line, I have the selection switch set to ‘all’. This means the client must have .NET 3.5 enabled. This step runs a simple PowerShell script to make sure the .NET 3.5 feature is enabled. In our environment, access to Windows Update is blocked and all patching is handled through MEMCM. This means I need to specify a source for the files needed to enable the feature. I created an additional package with the contents of a Windows 10 SXS folder from the serviced wim I create with @SeguraOSD‘s OSDBuilder. This is done with the following command in the powershell script.
Enable-WindowsOptionalFeature -Online -FeatureName "NetFx3" -Source "sxs"
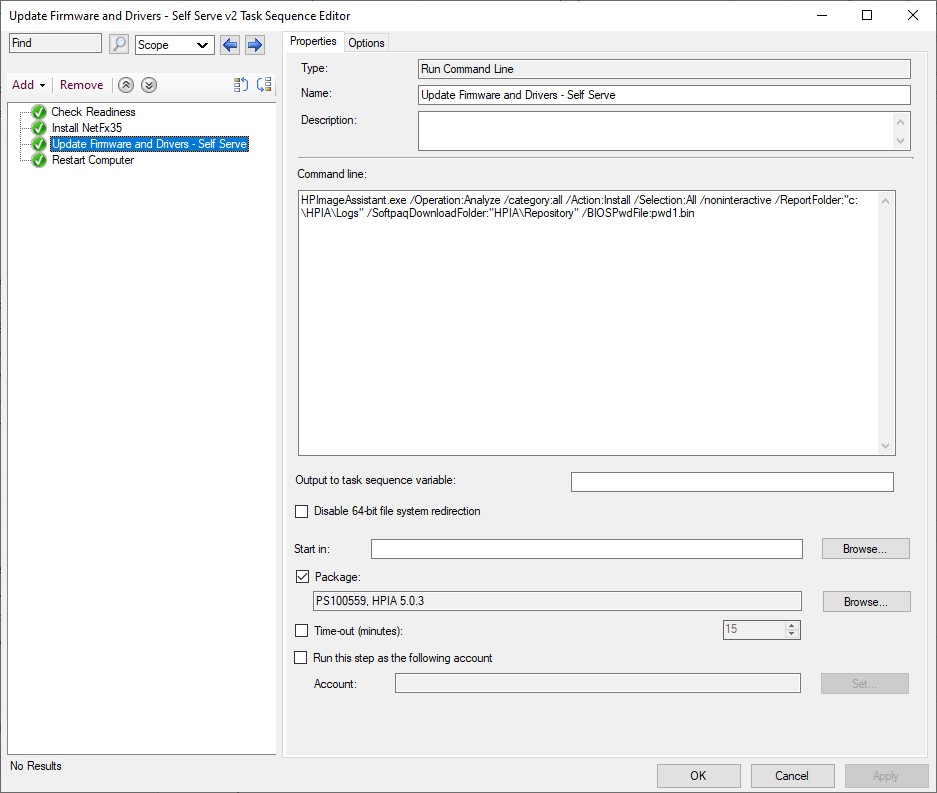
HPImageAssistant.exe /Operation:Analyze /category:all /Action:Install /Selection:All /noninteractive /ReportFolder:"c:\HPIA\Logs" /SoftpaqDownloadFolder:"HPIA\Repository" /BIOSPwdFile:pwd1.binThe third step is the HPIA command line. This step will pull the HPIA files and BIOS bin file from the package into a folder located at c:\_SMSTaskSequence. This folder is not available for standard users to view, so this is a great location to store the files and encrypted BIOS password bin file. In addition to the HPIA package files, the /SoftpaqDownloadFolder is set for a sub-directory inside the _SMSTaskSequence folder. This works well as a location, as the _SMSTaskSequence folder is removed at the conclusion of the task sequence. This means the BIOS password bin file and all the downloaded softpaqs will not be left on the client hard drive.
Note: The /ReportFolder is set to c:\HPIA\Logs, which remains at the conclusion of the task sequence in case you’d like to review what was updated.
I also chose to ‘continue on error’ on the options tab on the HPIA step. This will ensure the sequence still completes successfully, even if the client has trouble contacting HP’s servers.

A reboot to the running OS is the final step. If a BIOS, or other firmware update was needed, they will be applied during this reboot. Instruct users that it is very important to allow the firmware updates to complete. The process will be complete when the client returns to the Windows 10 login screen.
Deployment
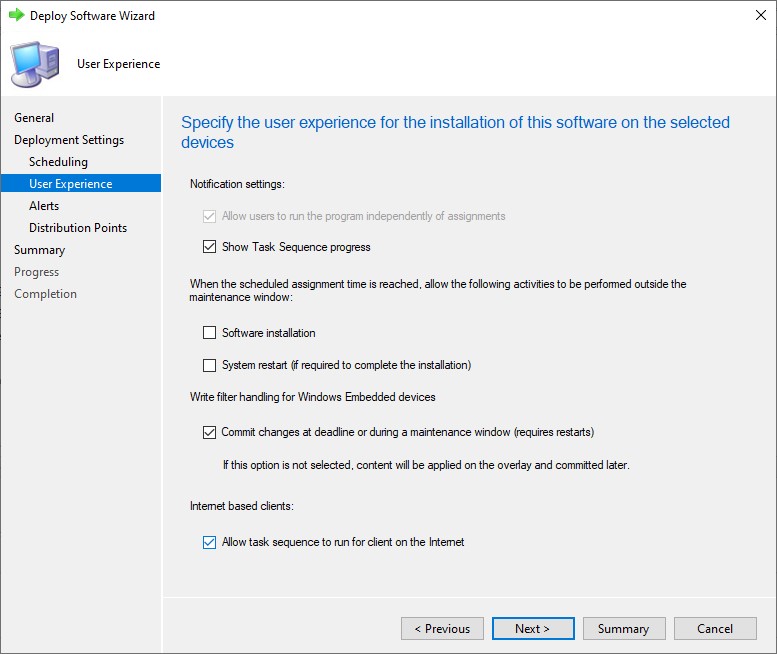
Run through the Deploy Software Wizard, making sure to check the Allow task sequence to run for client on the internet. Because this is not an actual OSD task sequence, and never booted into WinPE, the sequence will not be treated as a high impact deployment. When deployed to machines as available, the sequence will appear in the applications node of Software Center.


Conclusion
With the increasing amount of users working from home, utilizing a CMG is a great way to safely deploy important firmware and driver updates to devices outside of the network. Assuming the end users are not using a metered internet connection, this approach keeps costs down. Hopefully this post will help out anyone struggling to stay current!
